Easy goal setting ideas for students of all ages

goal setting, goals, student, teacher, flip book, display, new, year


Setting goals is an essential skill all students need to work on in order to keep them engaged and focused. Most children are keenly aware of academic areas they need to work on, just ask any school age child what subjects they love and which they hate and why. 

Last year I began goal setting in the first week of school, primarily in order to establish areas where THEY felt they need work. I can easily see grades and work achievement standards from the previous year's data but I could not evaluate the student's own perspective on areas they needed to work on and why - without this goal setting activity.

I'm going to show you two examples of goal setting activities you can do with younger or older students, both of these are available in my Goal Setting Pack for 2018 (this will be updated each year).

Younger students

rocket, goal, setting, new, year, early, primary, techteacherpto3

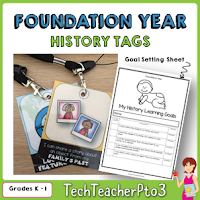
For students in Foundation to Year 2, you will need to keep the focus on ONE specific goal. Students will mostly likely select 'maths' or 'reading' but you will need to guide them to something specific and measurable such as:

I will learn my times tables up to 10

or

I will learn all of my yellow sight words

Keep the goals short but attainable in a reasonably short space of time.

Next, how will students know they have reached their goal? What will success look like for students in your class? Will they move up the reading wall? or get a certificate from you to take home? You will already have an idea of how you will celebrate success and this is where you can explain it to students. 

The rocket creates a fantastic wall display and you can top it off with the additional signage provided in the pack. 

Older students

goal, setting, new, year, flip, book, student, students, teachers, classroom, back to school, techteacherpto3

For students in grades 3- 6 I recommend the flip book contained in the Goal Setting Pack for 2018. Here are the steps I would use to talk students through the different stages.

My Goals
As above, get students to be specific about their goals. Last year I had a student who said "I want to get a C in English!" this was what she had actually been told by her parents. However, what does a C look like? This is where you will need to guide the student into curriculum specific areas such as:

I will write in complex sentences.

or

I will use noun groups when writing descriptive sentences.

This gives students a very specific goal to work on. I suggest getting students to think of ONE English, ONE maths and ONE other goal (this could be getting on a sports team or joining a club and doing well).

Strategies I will use
How will they achieve their goals? Here you will need to give your students lots of examples of the ways in which they can reach their goals within your classroom/school setting such as:

I will read for 15 minutes each night.

or

I will ask for help with my maths homework if I do not understand it.

These are strategies you can keep referring back to all year "remember when you said you would come and ask me if there were parts you did not understand of the homework?" - refer to flip book.

Reaching my goals
How will students know they have reached these goals? Improving their grade is the most obvious way but you will need to structure some tangible ways they can show they have achieved their goals such as giving them an award at parade, classroom recognition on the writing wall... etc.

What will success look like?
Don't let students skip this step and write 'happy' in the boxes. This is THE most important step. They need to visualise what success looks like, sounds like, feels like. Yes they will feel 'happy' (here is your chance to force them to expand their word bank!) but what will success sound like? Cheers? Claps? Mum and Dad saying 'well done' ? Only your student will know what incentive they will need to drive them on towards their goal.

You can download the Goal Setting Pack for 2018 here and it comes with both the rocket flip book, standard flip book and wall sign.


Behaviour Management In Your New Classroom

behaviour, behavior, management, rules, classroom, class, new, teacher, first days of school, back to school

You’ve just graduated. You’re super excited to start your new teaching career. You are busting to get
into your new room and decorate like crazy, plan lessons and get to know your students but where to start?

Having a behaviour management plan should be your first priority in any classroom. How will your students know what the rules are and how to follow them?

Different year levels will require different expectations but there are many key behaviours that students should be following, regardless of year level:

Whole body listening

Young students will need to be taught what this looks like (sitting still, legs crossed, eyes on the
teacher, hands and feet to yourself, mouth is closed). 

All students will appreciate a visual reminder but young children need daily reminders of what whole body listening looks, feels and sounds like. Posters are great examples and a gentle reminder at the start of each lesson is a good practice to get into such as:
classroom, rules, poster, sitting, class, rule, whole body listening

"Look at this picture of a little boy. He’s showing some great whole body listening. His eyes are OPEN, his mouth is SHUT, his hands and feet are TO HIMSELF, his legs are CROSSED."

I often get students to chant the key words so we’re all on the same page before any lesson starts. Don’t forget to use that positive behaviour management reinforcement when you see a student doing the right thing:

"oh wow look at Suzie sitting there so beautifully. Her back is straight, her eyes are on the teacher, her hands and feet are to herself and her mouth is closed. She’s showing some great whole body listening."

This is a 100% surefire way to get every child in that room to lift their game. It works every time.

SIDE NOTE; I often seen new teachers keep young children sitting on the floor for far too long. Young children have a limited attention span so 5-10 minutes at the very most should be spent sitting on the floor listening to instruction, after that you’ve lost them. Short sessions on the floor before a hands on activity is great but keep it short and to the point then move them off to the activity and return to the floor when done. Be tuned in. As soon as you feel the students shifting in their spots you know it’s time to move it along.

What about older students?

Older children still need this rule reinforced but as they are not sitting on the floor anymore the behaviour example needs to be modified (not doodling, not reading a book while the teacher is teaching, not talking while the teacher is talking etc…). Personally, I’ve found team points work wonders with older children. I divide children into table teams and award points for positive behaviour. Very rarely do I take points away but sometimes it’s necessary:

“John is really showing me that he is listening as his eyes are on me and he’s ready to learn so I’m going to give his team 2 points” 

or 

“Sally you gave me the correct answer but sadly you shouted it out so I can’t give you any points for that/I’m going to have to deduct 1 point from your team”. 

This really works with older children who have more self-control and they are hugely competitive in upper primary so I highly recommend this. 


One year I had a class that was amassing a huge collection of points for their teams but I had never even discussed what a reward was with them! They just loved collecting points and beating the other members of the class! 

Calling out

This is a really annoying trait that some students have and younger children often have limited self-control when it comes to waiting their turn. Calling out can start with one student and, if not nipped in the bud, can spread like wild-fire to other students and this is how problems with behaviour management occur. 

When motivated, students will do nearly anything! There are a few simple but effective ways to stop calling out in class such as the positive behaviour management model of point scoring for teams (as mentioned above) or simply ignoring such behaviour. Sometimes, however, ignoring bad behaviour only makes it worse and the student behaving this way will only enjoy the peer attention. 

raising hand, raise hand, class, rules, classroom, rule, behaviour, behavior, management


Remember location, location, location!

Just your location in the room will nip bad behaviour in the bud. Standing near a chatterer when you’re teaching is a good idea or locating yourself near the table of the shouter means you can gently use your body language to close them down and focus on those that are doing the right thing.

Sometimes I feel 90% of our job as teachers is behaviour management. However, it is true what you’ve been taught at Teacher College. Get the behaviour management right at the start of the year and you’ll be on top of your game all year long. NB: Actually I’m pretty sure they said ‘Don’t smile till Easter’ but whatever works for you!

You can grab these bright and cheerful classroom rules here.

classroom, rules, posters, class, behaviour, behavior, management,


The first hour of the first day

back to school, teachers pay teachers, download, teacher, primary, school, first day school, first day, nameplate, students

It's the first day of your new school year.

The first hour in fact.

If you're new to teaching you're going to be filled with excitement and apprehension about what the day will hold.

If you're an experienced teacher you will undoubtedly have your own special bag of tricks to delve into and some teachers hold hard and fast to what activities they will do within the first hour.

There are definitely some 'must do' activities for the first hour, such as introducing yourself and packing boxes of goods away. Lots of 'get to know you' games are fun, as are team building activities.

However, experience as taught me that the first hour on the first day is possibly THE most messy and fiddly time to try and do any introductions or group games. Last year I had at least 3 students enter, set up at their desk and then realise they were in the wrong classroom and moved again. I had lots of new students to the school who were lost and so arrived a little late and many, many, many parents that wanted to have a 'quick chat' with their child's new teacher.

I'd like to share with you a little something that I found worked perfectly for the last few years that is easy for students to follow and independent tasks to work on whilst you set up the room, talk to parents and arrange/rearrange confused students into the correct spot.

Before students arrive I place a template on each desk so students can create their own name plate. This gets things moving nice and quickly and nervous/anxious students can start work on something right away.

nameplate, desk name, student, first day, school, teacher, primary

Students just LOVE personalising something to go on their desk early in the year and this is going to help you enormously with behaviour management (nothing gets a student's attention quicker than using their name!).

I also get students to complete a get-to-know-you sheet which we immediately hang on the wall in the classroom. Students like to work on these all week so I let them work at their own pace, complete and hang on a spot on the wall when they are ready.

get to know, student, first day, activity, activities, school, primary, teachers pay teachers, download, teachers

In addition to being fabulous and constructive 'busy work', these activities allow you to see student's skills first hand within minutes of them starting work. Do they rush? Do they need time to perfect their work? What type of learner are they? Last year I had a perfectionist who simply would not be rushed. I also had a student with a 'messy nature' who struggled with hand writing all year long. It's great to get to grips with your students early on, so this year - why not give these activities a go and let me know in the comments below how you went?

You can find these activities in my Teachers Pay Teachers store, where you can also find this fantastic freebie for Goal Setting!

first day of school, teachers pay teachers, teachers, teacher, school, student, back to school

goal setting, student, goal, teacher, teachers, teachers pay teachers, semester, year, goal


My top tips to help you cope with the craziness of Christmas

Christmas teaching ideas

Here in Australia, we're approaching the last few days of the school year.

Report cards are done (well they are with our deputies for sign off but as far as your average classroom teacher is concerned they are done and dusted!).

School Christmas plays, farewells and other activities are in their final stages or have just been completed.

...and we are counting down the last few days before summer holidays!

The stress of the 'end of year' can be overwhelming when there is so much to do!

Most aussie teachers will now know what year level they will be teaching next year and what classroom they will be in. A lucky few will be on the same year level and the same room! However, most will be moving rooms, year levels and sometimes even schools! Every teacher I speak to is feeling overwhelmed and the added pressure of Christmas can sometimes send students and teachers a little crazy.

What to do?

Here are my 5 quick tips for surviving the Christmas school crazies...

1. Make a list.

Listen Santa does it so it must be good but even he has to check it twice! Try not to make lists on lists on lists as this will only compound the problem. I make a list for Christmas tasks to do at home and a list of school related jobs that need to be done.Two  lists, keep them handy and check them regularly. Just the process of making a list can keep you focused on what needs to be done.


2. Plan ahead

I'm often accused of over planning but I'm a strong believer in being prepared at all times. If you don't know what room you're moving to next year, don't wait to be told. Chase the information down and if you still can't get your admin to commit to a room start to pack your things up and take them home. It's easier to do this bit by bit, something each day, than to have the stress of heaving all your teaching materials home on the last day.


3. Get your class set with some activities they can do themselves.

Once your students are busy with a craftivity then you can focus on editing report cards, packing your belonging or even preparing materials for next year. Christmas is the one time of the year when you can go to town with your Christmas crafting and nobody blinks an eye! If, however, you have a principal that frowns on crafts in the last few weeks (there are a few out there) then try some Christmas Around the World packs (Geography and Art). My students have been busy creating some Farewell Folders by themselves while I printed and laminated my posters for my new room next year. Self-directed and busy on task, while I do some last minute jobs. Perfect.


4. Take care of yourself.

Getting enough sleep can be hard when you're worrying about end of year events that fill the calendar at this time of year. However, it's essential you get plenty of sleep and drink lots of water to stay hydrated. Christmas party nibbles and after work drinks can add to an over stressed body. Nothing puts a spanner in the works like getting sick when you have a million things to do.


5. Enjoy yourself

As I watched my students at their leaving party, I was touched by how much they had grown since the start of year. Teachers are really so lucky to actually see the impact their teaching has on little lives. I love this image below, it reminds me that even though we only touch their lives for 12 months, we are just one of many that help that child grow into a citizen of the world. Powerful stuff! Give yourself a pat on a back and sit back and enjoy the final few days with your 'kids' - you know you'll miss them!


Christmas Cookies Sequencing Activity


For young students, the process of learning to sequence events in order with the correct phrasing can be difficult. It's a skill they will use in mathematics, English recounts and retells and in history which is why practicing this skill is so important.


One of my best sellers for sequencing is the picture card packet (click here, then 'Preview' watch a video demonstration) and it really works for reinforcing the concepts of first, then, next and lastly when sequencing. 

With Christmas in the air and excitement rising about nativities, craftivities and all the other 'tivities' going on, I considered the possibility of bringing some real-world, hands-on sequencing tasks into my student's lives. Cooking is one way to reinforce the importance of getting sequencing right and gives students a great real-life experience to write about (no writing prompts need here!).

Okay, so not all teachers are going to have access to a stove at school, however, I have set this task for homework before and it's been a fantastic reinforcement. This pack comes with several useful resources that can be put together in the classroom and taken home for homework. Parents can see first-hand how well their students can sequence and share a fun baking activity with their child. Who knew homework could be this much fun!


Well 'The proof is in the pudding' they say and so I set about baking some cookies with my middle child to show you how it's done. 

 FIRSTLY we preheated the oven and lined two trays with baking paper.


NEXT we beat butter, sugar and vanilla essence for 2 minutes after which we added an egg and flour.


...we also added chocolate chips!


THEN we rolled the mixture out flat...


and cut out shapes with our cookie cutters (my child demanded two gingerbread men shapes)


LASTLY we baked our cookies for 15 minutes.


After all that fun of baking we then did a recount with our fantastic flip book (available in the pack)

The flip book can be used with or without the enclosed images and allows students to practice their recount in their own words using the flip book prompts.


Also inside this pack you can find some useful retell sheets, bright and engaging sequencing images for your whiteboard and some cute cookie labels for the finished product.


You can find the complete pack here, where you can see a video preview of the flip book in action.


Alternatively, if you'd like to try my free sequencing pack just click here.


5 Ideas for making Halloween easy for your child with autism


If you have a child with autism or know one, you can probably imagine the potential problems that might spring up when you take them trick or treating. If you do not  know much about autism, it can be difficult to describe how a person with autism might feel, as each person displays different traits on the spectrum. However, imaging you are in a busy shopping mall with a lot of noise and activity on Christmas Eve and you have the stress of buying presents on your mind. Then imagine you are required to answer questions whilst under this pressure. You may feel a flight or flight sensation, which children with autism do when put in busy, stressful situations. Halloween can make your child with autism feel that very flight or fight sensation so here are some suggestions for helping them deal with this holiday event.

1. Do you really need to go?

Is your child going to realise they have missed something fun or will you manage to get away with not going out for trick or treating? You know your child best and know how they react to particular situations. Will they be able to cope? If the answer is no, then stay at home - it really sin't worth the stress for everybody and try again next year. If the answer is yes (such as in my case, my daughter with autism will be adamant she wants to go), then off you pop but you need a plan of attack (perhaps that's not the right word!).

2. Have an exit strategy

Develop a plan with your child about what you are going to do, for how long and how it will be done such as: firstly, we will go to these houses, then we will knock on their doors, if they answer we will say 'trick or treat!, then we might get candy... 

Discuss the plan (or better still draw a visual) with your child so they have a clear idea of what to expect and what to do if nobody answers or they don't give out candy! Then build an exit strategy into your plan so everybody is clear on the rules such as: if you run away from me - then we have to go home. This will help you later if things unravel, but don't be afraid to up and leave if things become too much.

3. Bring the appropriate equipment

My daughter rarely leaves the house without her sound reducing headphones nearby. She wears them when she knows there will be loud noises or just lots of traffic around. If your child with autism needs a soother or piece of equipment to help them get through trick or treating, then be sure to bring it along.

4. Let people know your child has autism

Wearing a badge or some sort of signage is a great way to let others know that your child has special needs. You do not need to buy one, even a sticker with writing such as "I have autism, please be patient with me" can work wonders. My daughter wears a badge when she goes out and this is because she wants to. It goes without saying that your child must be happy to wear this sign before you put one on them!

5. Have fun and relax

Your child may not want to wear a costume or they may want to dress in something very odd! Pick your battles and try to enjoy the evening. Practice what they might say through role play, when they knock on a door. Explain that people may or may not give candy and that's okay. 

The irony about Halloween as a holiday season is all children are wild, over excited and often act inappropriately, so your child with autism will not be standing out!

Side note:
If you're not going out for trick or treating, ensure your child knows what will happen that evening. That strangers will be coming to your door. Be extra careful on this night if you don't want visitors knocking on your door, a small sign would be appropriate nearby. In some neighbourhoods, it is encouraged to only turn your outside light on if you are taking part, if not keep your light out. Find out what your neighbourhood custom is and do the same.

Good luck and Happy Halloween!

5 easy ways to integrate ICTs into your Geography lessons


There is really no better way to engage students of all ages, than with information and communication technology (ICT). Students just love the hands on elements that ICTs provide and listed below are five super easy ways to integrate ICTs into your geography lessons.

1. Google Earth - Equipment needed: computers/ipads and Google Earth software (free to download)


Whole Class: I love starting a lesson with the spinning globe.. just sitting there, spinning with no explanation of what we are doing that day. Let the students get all excited and hooked in early on! It's always fun to zoom in on your school's address and hear the kids go 'wow!' as they see their school. Google Earth also provides the perfect opportunity to discussion birds eye view verses street view by using the little figure to jump on to the road outside your school building. 

Independent or pairs: Find your address and draw a birds eye view of your house. 

2. Bee-Bots - Equipment needed: Bee-Bot robots and hand built floor map or tiles


Whole Class or Pairs: These are great for K-2 years and a perfect way to solidify their knowledge about direction and positional language. Draw a map on tiles or on a large canvas (I've seen classes where the teacher has just turned over an old Twister mat and drawn a map on there with the students). Keep the lines nice and wide when drawing roads as the Bee-Bot will need to move along them. Now students must program their Bee-Bot to follow directions to a set location. Great for exploring birds eye view, map directions and digital technologies.

3. History Pin - Equipment needed: Visit the History Pin website and computers/ipads

History Pin isn't just for discussing history but it can specifically address the Year 1 HASS curriculum set by ACARA for 'how places change'. Visit locations to see photographs of places as they change over time. Students love exploring this website and you can even add to your own school location by taking some photographs of your place!

4. Draw on Map App - Equipment needed: Draw on Map app (paid version if possible) and iPads


There are a few mapping apps around but I really like this one because students can draw directly on the map. This makes it perfect for young students who can demonstrate their understanding of direction by using their finger to record a path to a location. You can also switch between satellite maps and street maps, so you can zoom in on your school or even your student's own house to make it even more personal! The free version of the app is great but if you go for the paid version you'll get more features such as pasting images of buildings and arrows.

In pairs: Draw a path from your house to your partner's house. Take a screen shot and save or share with the rest of the class through mirroring to your SmartBoard/laptop. 


5. Interactive QR codes - Equipment needed: iPads and any of TechTeacherPto3s Geography packs


Independently or in pairs: students scan the QR code and examine the photograph of the place being discussed. Examine the photograph, what features can they see? Where is this place? What is this place used for? Images are stored in Google Drive but are set up so you do not need a Google Drive account. This is a great activity for students to undertake with iPads and encourages hands on engagement with geographic terms and images. You can find Geography packs for Foundation, Year 1 and Year 2 all with QR codes by clicking here.

Spooky senses Science fun in the classroom

Halloween science fun that explores the senses! This simple Science activity will help your students describe objects using only some of their senses.

I love integrating units of work with seasonal activities. It keeps students engaged and allows for cross-subject discussions. 

Halloween is a great example of this because, even though it's only just gaining popularity in Australia, it provides an opportunity to discuss other country's celebrations and ways that the change of seasons are marked.

When I was growing up there was a game called Nelson's Eye that was played at parties and this is especially fun at Halloween when everybody is in full spooky mood!

I've created a variation on the old Nelson's Eye game so that my students can explore their five senses. I call it What's in the bag!

Halloween science fun that explores the senses! This simple Science activity will help your students describe objects using only some of their senses.

Here is what you will need to set up the game in your classroom:
  • a canvas or non-transparent bag
  • plastic resealable bags
  • senses flash cards (you can grab these for free at my store, just follow the link below)
  • various objects that are soft, squishy, noisy, hard, soft etc.. to place inside the plastic bags. Some examples I've used before are:
    • hard boiled eggs, mashed or whole (like an eye!)
    • boiled spaghetti (veins!) or hard uncooked (children will think these are sticks)
    • grapes (more eyes that go pop!)
    • wool (monster hair)
    • ice mashed or hard
    • mud (guts)
    • dried apricots (tiny brains!) 
Halloween science fun that explores the senses! This simple Science activity will help your students describe objects using only some of their senses.

How to play:
  1. Place 1 item, secretly in the bag. Don't let the children see what it is. Leave it in the plastic resealable bag otherwise you'll have a huge mess on your hands (or if you're game you can use a fresh canvas bag each time and just wash them after use).
  2. Pick one student to come to the front and place their hand in the bag. Discuss with the student which senses they are using by sticking the flash cards to your whiteboard.
  3. Ask the student to describe what they are feeling before guessing. This is a great opportunity to get students to discuss vocabulary for materials (soft, hard, long, short, round, square, squishy!)
  4. For the Halloween spin you could say "is it a witch's eye?" and the children will all say "ugh yuck!"- but they are engaged! 
  5. After a while let the student guess what the item is and show them by pulling it out of the bag. 
  6. Repeat again and again until all students have had a turn.
  7. Reflect or brainstorm all the vocabulary you've used to describe the items inside the bag by writing them down on the whiteboard as you go along.
  8. Review the senses they used - could they see it? hear it? smell it?
If you'd like to grab a copy of these five senses flash cards just click the image below. 
If you enjoyed them, please leave a 4 star review.

Halloween science fun that explores the senses! This simple Science activity will help your students describe objects using only some of their senses.

Halloween science fun that explores the senses! This simple Science activity will help your students describe objects using only some of their senses. #techteacherpto3 #foundationintofirst #halloween #science


Using tags to engage students in HASS

Use tags to engage students in History and Geography in early years HASS.


Have you heard of the new craze sweeping classrooms called tags? 

Well they might not be 'new' to US teachers but here in Australia we're yet to get on board that tag-train yet. However, I've found tags a really useful way to engage little learners in complex (let's not say 'dry') subjects such as Geography and History. 

I've used these little tags with Foundation through to Year 3 students and they are very popular (yes even in Year 3!). Students just love to find a way to show off to their peers and what better way than to prance around the playground with your achievement on your chest.

Preparing tags.
  1. You print out and laminate your tags and then punch a hole in them (don't worry you will use them year after year so it's time well spent). 
  2. Find a small container to keep them in so they are handy behind your desk.
  3. Purchase some lanyards (I got mine cheap from the dollar store but most places that supply stationery can provide them). I usually purchase one lanyard for each child but if you're planning on using tags for different subjects it can be useful to have a lanyard per subject.
  4. Create a small wall space for your lanyards to hang when students are not wearing them (such as when they go home) by assigning a student name per hook with sticky labels. 
The purpose of tags.

The aim of tags is to engage students with small achievable goals and, once reached, give them a tag to wear on their lanyard. 

I created some Geography and History tags to use with my Foundation Year students last year and, using a matching goal sheet, I would give out tags when students reached that academic goal.

For example, the Foundation Year Geography ACARA elaboration we were working towards was...

I can describe how places can be cared for.


Once I felt the student had mastered this elaboration, I ticked their goals sheet and awarded them a matching tag.

The goal sheets became particularly useful during parent teacher discussions. I would pull out the student's geography book and inside the front cover would be glued their goals for the whole year for that subject. I would use it as a reference point for discussions with parents about goals met and new goals we are aiming towards.

Students loved their tags and it became a bit of a battle to get them to take them off at the end of the day. I know some teachers let them wear them home, but you know you probably won't see them again. I just trained my students to hang them on their hook and, like Pokemon cards, they began to collect all of the geography goals one by one! I gave students a second lanyard for their history goals, which proved equally successful!

Tags are a win, win for teachers, students and parents alike!

You can grab any of my tags for Foundation HASS subjects (below) and Year 1 HASS are also available at my TpT store. 

Use tags to engage students in History and Geography in early years HASS. Use tags to engage students in History and Geography in early years HASS.


Use tags to engage students in History and Geography in early years HASS. #foundationintofirst #history #geography #teaching #earlyyears